Focus Stacking Image Comparison
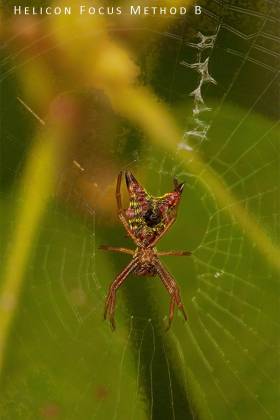
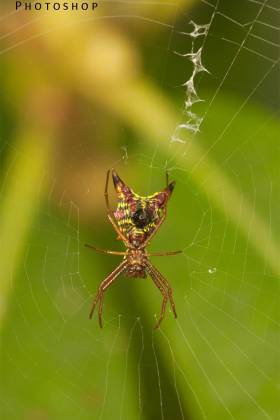
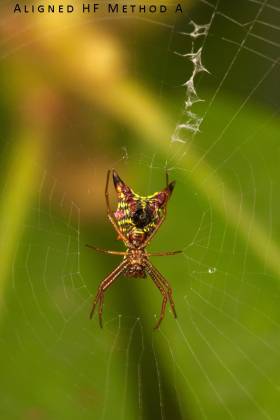
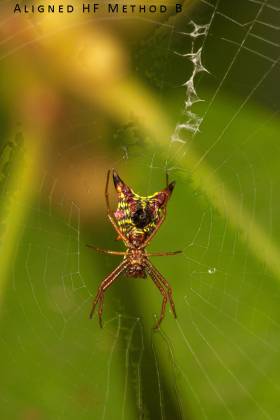
These images are a result of a concerted effort to understand focus stacking, and two methods, Helicon Focus (HF) and Photoshop (PS), of processing the focus slices into a single image. Helicon Focus provides two methods of focus stacking, and also has controls that can adjust the performance of the stacking algorithms and both Method A and Method B are typically displayed. While Helicon Focus seems to do a better job overall of combining focus slices into a composite image, there are some instances where Photoshop was able to process an image that was impossible to complete in Helicon Focus. In addition to subjects photographed outdoors, I conducted experiments indoors to eliminate some of the variables normally experienced in the outdoors; moving subjects and changing light. Helicon Focus does not performance well unless the camera is held steady (on a tripod), the focus steps are roughly equal, and the brightness is consistent in the set of images to be combined.
The comparison images are presented without editing of any sort with the exception of resizing and occasionally cropping an image so that the Photoshop and Helicon Focus images match. A few images may have a small increase in brightness for ease of viewing detail. Additional images may be presented which are obviously cropped to illustrate some detail. The image comparisons below are presented in the order they were photographed.
1. Costa Rica Orchid
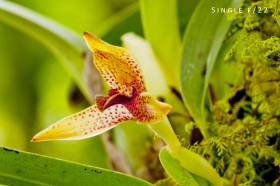
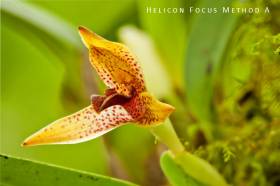
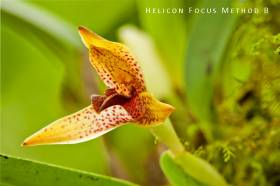
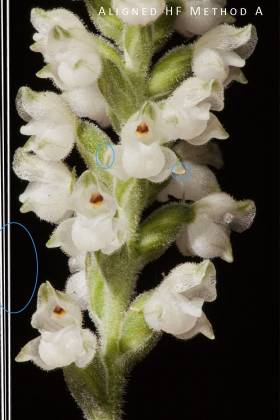
This image consists of 6 slices of focus at f/13. All three algorithms adequately combined the focus slices of the orchid and delivering a soft background without aberrations. The first image is a single exposure taken at f/22. It does not capture the entire orchid in focus, and results in quite a bit of definition in the background. This image meets the guidelines that Helicon Focus relies on; camera and subject fixed, and little variation in brightness and color. Helicon Focus Method A does slightly better at avoiding halo effects with a minor amount along the top edge of the left septal that can be addressed in additional editing.
2. Rattlesnake Orchid Stem
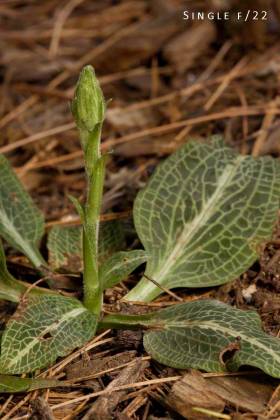
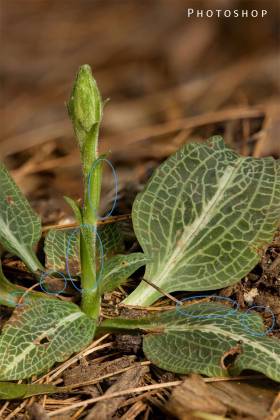
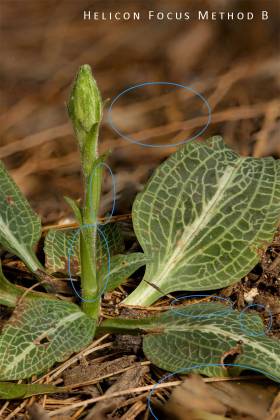
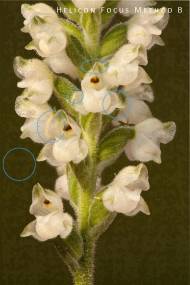
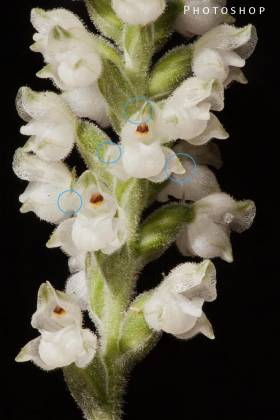
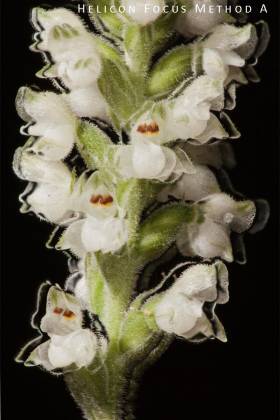
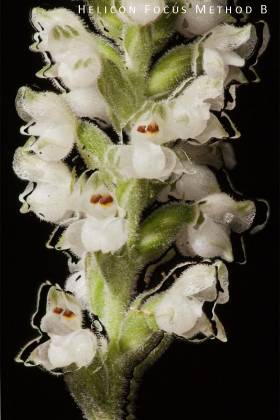
This was the first set extensive set of focus slices on a subject, 13 slices at f/8 taken with the Canon 5D Mark II and Sigma 150mm, f/2.8 macro lens. The shutter speed was 1/15th second at ISO 400. The plant was illuminated with a 160 LED lamp and a 64 LED lamp. However, the background was illuminate by natural light which did vary some during the capture of the focus slices. The single exposure at f/22 demonstrate the limitations of depth of field at this aperture on this subject; the stem and closest leaf are in focus but the rest of the plant is slightly out-of-focus. All three processes exhibit similar defects in processing; all have a halo along the both sides of the stem in the center of the plant as well as along the upper edge of the leaf on the right of the plant. The Helicon Focus images have some trouble selecting the appropriate components of the foreground, resulting in a strange out-of-focus area in the lower right of the image. Method B also provides some strange results in the background.
3. Rattlesnake Orchid Full Blossom
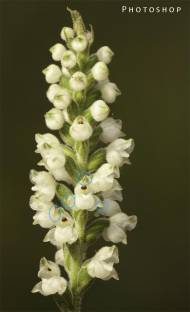
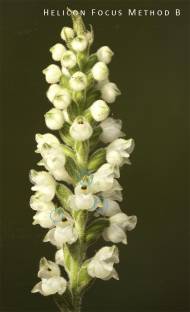
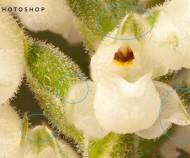
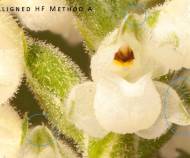
Five slices at f/8 and 1/25 second taken with the Canon 5D Mark II and Sigma 150mm f/2.8 macro lens. The camera and lens were placed on a beanbag to get as parallel with the flower as possible. The plant was illuminated with a 160 LED light on teh loft with a 64 LED light used as fill light from the right. The background lighting was uncontrolled natural light. Live View was used to determine the placement of the focus point for each exposure. The flower head is approximagely two inches tall sitting on a stem that is seven inches to the base of the flowers. There is some movement in the flower within the frame as the camera moved slightly for each exposure as the focus point was moved and buttons controlling live view on the camera were pressed. The initiall processing for this stack in Helicon Focus accentuated the limitations of the algorithms to assemble poorly alighned images in the stack. For this comparison, the five captures were brought into Photoshop and aligned using the auto-align feature, saved as individual images, then brought into Helicon Focus for processing. Both Photoshop and Helicon Focus assembled the composite images with processing errors, but some of these are attribuatable to the optical phenomenon of out-of-focus foreground objects making it impossitlbe to capture a clear in-focus object behind it without overlapping blur. The background in HF Method B has artifacts that could easily be fixed with additional editing. Cropped sections are shown to better view the halo and mismatch sections. Photoshop shows prominent halos around the edges of the blossom along with some incorrect selection of in-focus septals. Both Helicon Focus composites have reduced halos and might be rectified with additional layer masks during editing.
4. Rattlesnake Orchid Close Up
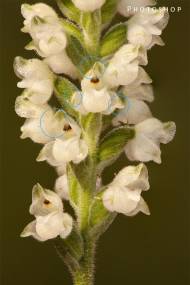
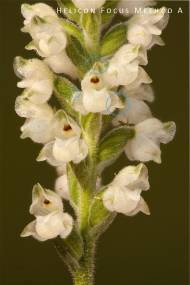
Moving in to the closest focus distance of the Sigma 150mm f/2.8 lens, I photographed seven captures at f/8 and 1/25 second exposure. Lighting and conditions were the same as in the previous image. To align the images for Helicon Focus to process the captures were brought into Photoshop, aligned, then saved as separate images to be imported into Helicon Focus. HF Method A performed well with the exception edge halos on some of the blossoms. Photoshop had the same issues with the addition of some areas where the software selected the wrong focus slice to use in the composite. HF Method B was unable to create a smooth background, resulting in a mottled “camouflage” look. On review of the individual captures for this stack it can be seen that the lighting on the background varied during the series of exposures. Helicon Focus displays a warning box when it detects excessive variance in the brightness.
5. Rattlesnake Orchid Lit with Flash
words
6. Sunflower Petals
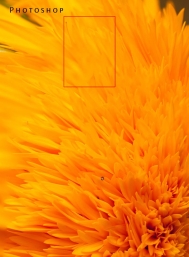
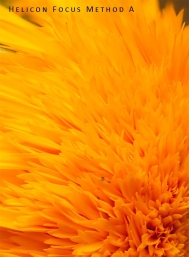
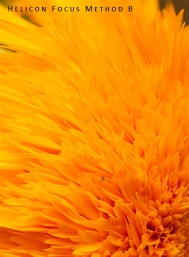
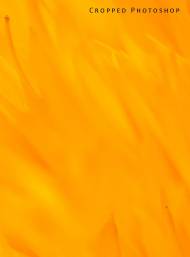
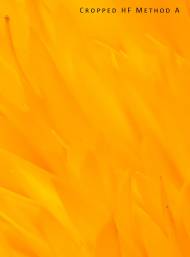
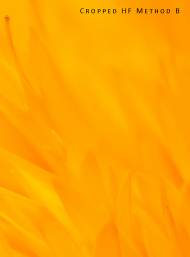
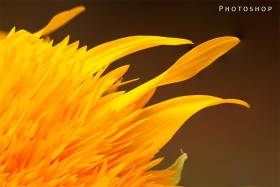
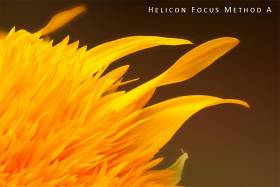
Eight captures at f/5.6 and 1/400 second made with the Canon 5D Mark II and Sigma 150mm /2.8 macro lens mounted on a tripod. It is a challenging subject in that has low contrast throughout most of the composition. There was no movement in the flower during the capture of the set of image focus slices. While all three processes result in usable images, the Helicon Focus Method A produces the best merging of the sharp portions of the image slices. The red box in the Photoshop image identifies the cropped sections shown below. It is clear that Method A provides the best composite image detail.
7. Sunflower SIde
Ten captures at f/5.6 and 1/250 second made with the Canon 5D Mark II and Sigma 150mm /2.8 macro lens mounted on a tripod. This composition of the sunflower offers more contrast among the petals and has several longer petals at different distances along the edge of the flower. Photoshop does not detect all the sharpest section of the petals when combining the slices, and does not include the one dew drop in the lower left corner of the composition. Helicon Focus Method A does a good merger of the sunflower petals, but has significant haloing around the edges of the petals where they intersect the background. Helicon Focus Method B in this case does rather well with the petals with the exception of the third long petal from the bottom, and the out-of-focus petal at the top left of the image. Using the Helicon Focus Retouching tool makes short work of both these imperfections by offering the ability to select the correct layer and substituting those components into the final composite image. The retouched image is provided for comparison.
8. Sunflower with Leaf
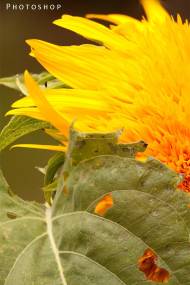
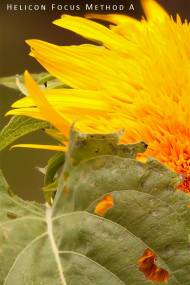
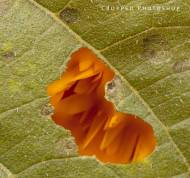
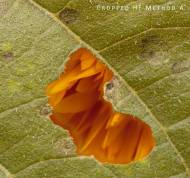
Five captures at f/5.6 and 1/250 second made with the Canon 5D Mark II and Sigma 150mm /2.8 macro lens mounted on a tripod. This series is lacking in an image or two that would provide information for the back of the leaf. I made these captures before I fully understood the process of making eth captures with sufficient overlap. For this image, I did not provide sufficient overlap at such a small aperture of f/5.6. This image is included in this set as it demonstrates one of the problems focus stacking has in general; it cannot beat the laws of physics. A foreground subject often prohibits the recording of the background subject in focus to the edge of the foreground subject. In the cropped images below the lower right section of the composition is magnified showing how each algorithm handled the in-focus petals viewed through a hole in the leaf. The Photoshop image has a significant amount of halo around the edge of the leaf hole. Both Helicon Focus images have less halo and only along the lower edge of the hole. HF Method B has a great amount of detail in the distant petals inside the hole, and the minor amount of halo might be rectified with some layer masking in Photoshop. I was unable to fix the halo using the retouching tool in Helicon Focus.
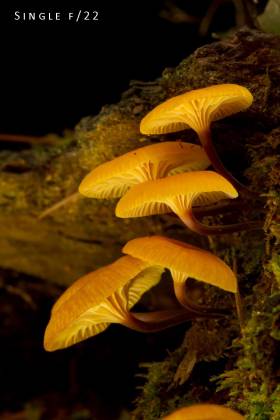
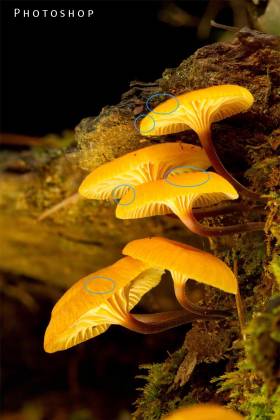
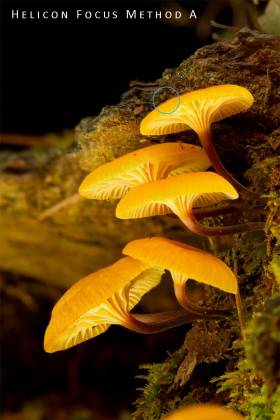
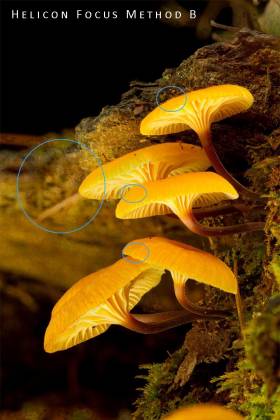
9. Mushrooms (Two Clusters)
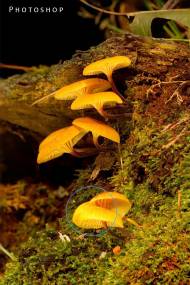
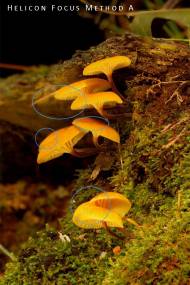
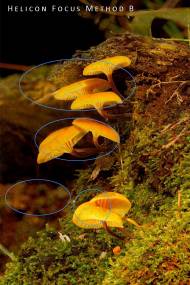
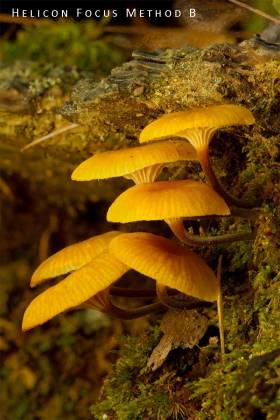
Twenty-five captures at f/14 and 1/100 second made with the Canon 7D and Sigma 150mm /2.8 macro lens mounted on a tripod. The mushrooms were in a forested setting, with light filtering through the trees. Lighting varied a small amount during the set of image captures. The challenge in this composition is a cluster of mushrooms in the foreground which overlap each other, that cluster overlaps the background moss, the distant mushrooms overlap each other, and those mushrooms overlap the background at a variety of distances. All three processes produced the halo surrounding the closest set of mushrooms, as well as a very soft rendering of the top of the mushroom cap. All three processes failed to use the sharpest focus slice to build that section of the image. The Photoshop composite image is very good with no artifacts in the rest of the image. Helicon Focus Method A results in a loss of texture detail on the mushroom caps and background, as well as a significant halo around most of the mushroom caps, with the exception of the topmost mushroom. Method B produced gross errors in processing the texture of the mushrooms as well as the out-of-focus background, likely due to the variation in lighting throughout the stack of captures. The Photoshop image may be useable with some layer masking of select focus slices, but the work required for Helicon Focus A would be too extensive and Method B would be impossible. A detailed examination of this image is presented in Focus Stacking – Part 3.
10. Mushrooms (Top Cluster)
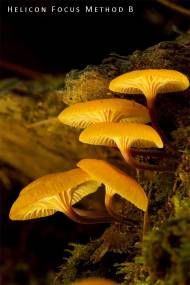
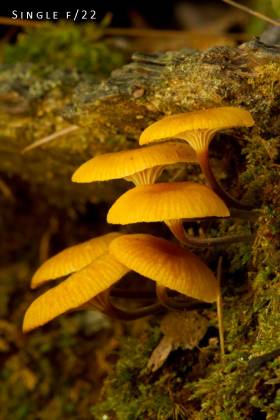
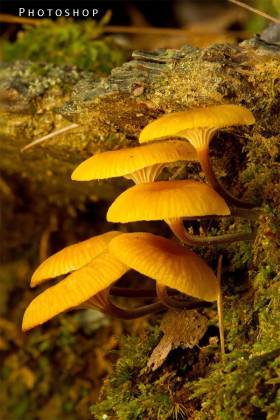
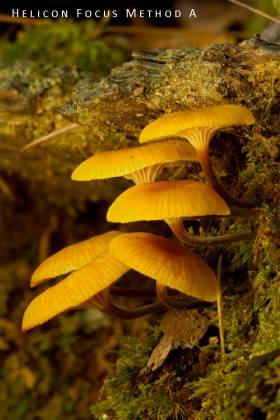
Twelve captures at f/14 and 1/20 second made with the Canon 7D and Sigma 150mm /2.8 macro lens mounted on a tripod. Other details as above. The first image is a single capture taken at f/22 and 1/13 second provided for comparison with the stacked images. The Photoshop composite image has a number of processing errors resulting in soft rendering of some texture areas in the mushroom caps and poor edge presentation along the tops of some mushroom caps. Helicon Focus Method A did much better with the only problem being the soft presentation of the top mushroom cap. Method B produced fewer errors in processing than the previous image but exhibited some green bands as well as the odd treatment of the out-of-focus background.
11. Mushrooms 2
Fourteen captures at f/14 and 1/25 second made with the Canon 7D and Sigma 150mm /2.8 macro lens mounted on a tripod. All three processes handled this set of images captures well with a minimum of processing artifacts compared with the previous image. The only differences between the two sets are composition (rotated slightly) and the number of captures in the stack, and it’s not a big difference so it is uncertain if this is the reason for teh improved rendition. However, it should be noted that all the image captures in this set have no variation in the illumination of the scene. All three images exhibit the haloing of the topmost mushroom under close inspection.
12. Mushrooms 3
Thirteen captures at f/20 and 1/13 second made with the Canon 7D and Sigma 150mm /2.8 macro lens mounted on a tripod. The first image is a single capture taken at f/22 and 1/10 second provided for comparison with the stacked images. . The Photoshop composite has no halos but the topmost mushroom cap is soft and would require some editing with layer masks to restore the correct in-focus components. Helicon Focus Method A has good presentation of the image and no halo. Helicon Focus Method B is mostly well done with the exception of a green band as marked. Layer mask editing to repair the image would be minimal for any of the three results.
13. Spider 2
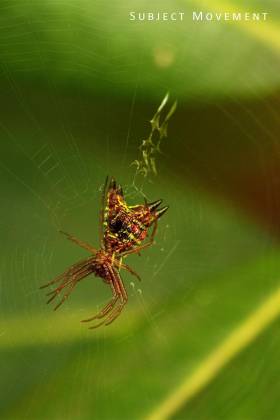
Seven captures at f/11 and 1/30 second made with the Canon 5D Mark II and Sigma 150mm /2.8 macro lens mounted on a tripod. The web was along the edge of a forest and lighting varied a small amount during the set of image captures. This is a case where subject movement proved too much for any of the processes to handle. A “double exposure” of the two focus captures that are farthest apart is provided to indicate the extent of subject movement throughout the stack of captures.
14. Spider 4
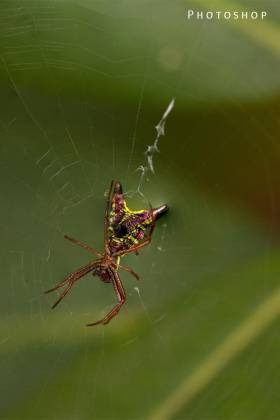
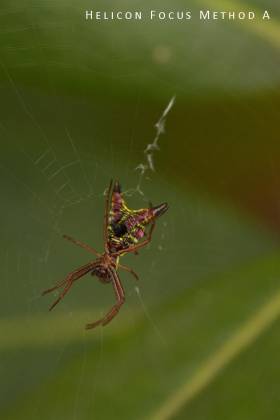
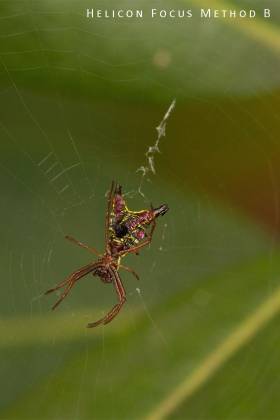
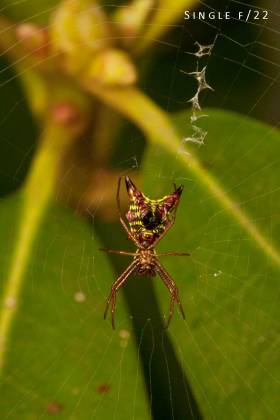
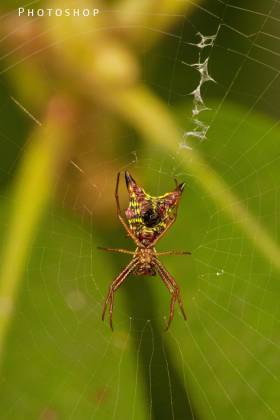
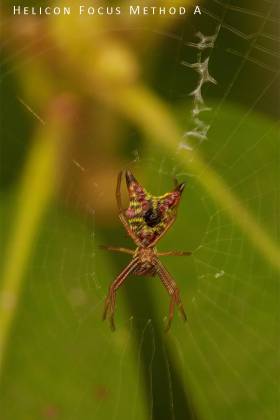
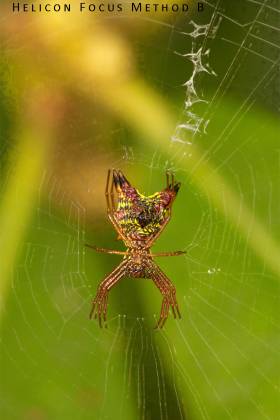
Four captures at f/11 and 1/40 second made with the Canon 5D Mark II and Sigma 150mm /2.8 macro lens mounted on a tripod. The first image is a single capture at f/22 and 1/13 second. In this composition the lens was set near the minimum focus distance of the lens (15 inches) and at f/22 provides a depth of field of .25 inches. This is just barely enough to capture the spider and some of the web, but a side effect is a slow shutter speed and significant detail in the background. Focus stacking was used to achieve sharp focus in the spider and the web and allow a softer background rendition. The Photoshop composite image is well assembled with no artifacts or anomalies. However, Helicon Focus does not tolerate misalignment of the image captures well. Helicon Focus Method A processed the background colors well but could not deal effectively with the subject movement of the spider and the web. Helicon Focus Method B did poorly with both alignment of subject parts and background color.
15. Spider 6
Three captures at f/8 and 1/30 second made with the Canon 5D Mark II and Sigma 150mm /2.8 macro lens mounted on a tripod. Taking advantage of the auto-align algorithm in Photoshop, the three focus slices were loaded as layers into one image, auto-aligned, then saved as separate images to be processed with the Helicon Focus software. The Photoshop result is very good, both aligning and blending the sharp segments of the three layers into a composite image. The blending process is really cutting and pasting adjacent sections of each of the captures, and Photoshop did very well to avoid any misalignment of adjacent parts of the web. The Helicon Focus Method A composite of the aligned captures is also very good but requires some repair of the web below the spider using the Retouching tool. The Helicon Focus Method B result has no hope of repair as this algorithm cannot effectively process captures that do not have identical illumination during the capture process.
Berries on a Stick
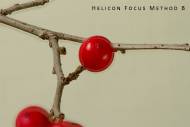
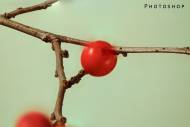
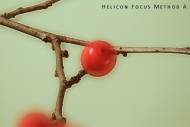
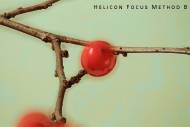
This series of images was captured in the effort to understand the stacking problem associated with halos appearing along the edge of in-focus foreground subjects with in-focus background subjects. Also, it became clear that Helicon Focus did not tolerate subject movement in the composition, nor did it handle variation in brightness in the stack of image captures. The stick with the berries was chosen since it had both a cluster of berries to explore the effect on subjects that were close to each other, and also had a single berry that could be arranged so that a stick passed directly behind it. The twig was held in a Plamp, two incandescent lights illuminated the setup in front of a green paper background, and the camera was set on a tripod. The camera was connected to the laptop with a USB cable and the Helicon Remote software controlled the focus adjustments and acquisition of the image captures. All the images were captured with the Canon 7D and Sigma 150mm /2.8 macro lens mounted on a tripod.
16. Berries 1
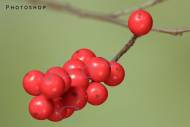
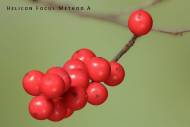
Sixteen captures at f/5.6 and 1/30 second exposure. The image is cropped from the original composition, cropping off approximately 50% of the original canvas, to increase visibility of the processing results. The Photoshop composite has many locations where the software did not accurately assess and retain the sharp edges. Both Helicon Focus Method A and Method B results were well assembled with the minor artifact marked on the images. This defect can easily be rectified using the Retouching tool. There are no halos in any of the three results.
17. Berries 3
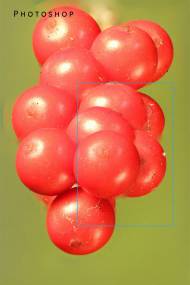
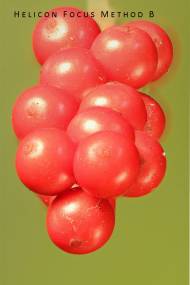
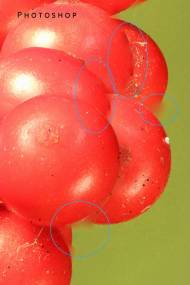
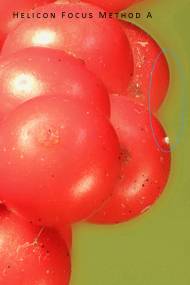
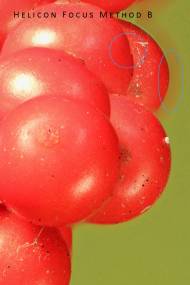
Fifty-five captures at f/5.6 and 1/15 second exposure. The Photoshop result has several areas of anomalies including some halos and bad selection of sharp sections, particularly along the edges of berries in the upper right quadrant of the image. The area enlarged is identified in the Photoshop image. Helicon Focus Method A has good merger of the berries but has a significant amount of halo along the outside of the bunch of berries. Helicon Focus Method B has much less halo than Method A, but has an error in the alignment of one of the edges. It may be possible to rescue the Method B image with some Retouching tool and additional editing in Photoshop with layer masks.
18. Berries 4
Thirty captures at f/10 and 1/8 second exposure. The Photoshop composite has a minimal amount of processing faults including a bad merger near the stem, and two areas where the highlight behind the edge of a berry is out-of-focus. It appears that the Photoshop algorithm has difficulty in selecting a sharp section where it overlaps another more distant object. As can be seen in the Helicon Focus images, there is texture in those areas available, it is simply not being included in the Photoshop merging algorithm. The Helicon Focus Method A image is very well done and the Helicon Focus Method B only suffers from some bad handling of the smooth color areas in shadow.
19. Berries 5
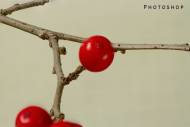
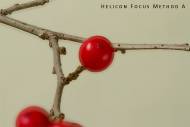
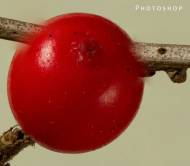
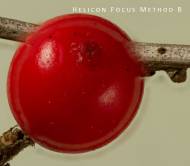
Thirty-five captures at f/8 and 1/50 second exposure. This composition was set up to examine the relationship between an in-focus foreground subject overlapping an in-focus background object that has some separation between the two subjects. In this set up, the berry is one inch forward of the portion of the stick directly behind it. The Photoshop composite image is very well handled except for the region where the side(s) of the berry overlap the stick. The rest of the image is clean and sharp except for the small out-of-focus stick segments in the upper left corner, which would be eliminated by cropping. The Helicon Focus Method A image has a slight halo around the berry and along most of the sticks, and the berry itself has the appearance of a berry within a berry. The berry could likely be repaired with the Retouching tool, and the halo could easily be removed with layer masking in Photoshop. Helicon Focus Method B has a more severe halo on the stick and berry, and the berry in berry effect is more pronounced.
20. Berries 7
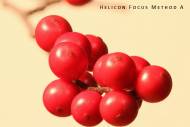
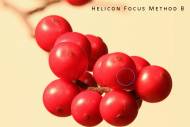
Thirty-six captures at f/2.8 and 1/400 second exposure. This set of captures was made to compare the results of using a larger aperture of f/2.8 with the previous set taken at f/8. The Photoshop result is the cleanest with a minor halo on the left side of the berry, but the intersection with the stick is more pronounced with sections of stick showing well into the berry. The image could be repaired with layer masking of the berry parts, as well as the adjacent areas of the stick. Helicon Focus Method A has halos along every sharp edge, and the berry appears mostly translucent with almost complete rendering of the stick behind the berry visible. The Helicon Focus Method B result is very poor with the berry and stick merger problems of Method A but also a color pollution problem with some red component of the berry dispersed throughout the green background. This set of images provides a vivid presentation of the changes in subject size resulting from moving the focus point through the subject; the size of the out-of-focus berry is considerably smaller than the in-focus berry revealing more of the stick to the camera sensor. However, this doesn’t help as the berry’s out-of-focus color blur extends beyond the edge of the in-focus berry when the composite image is assembled.
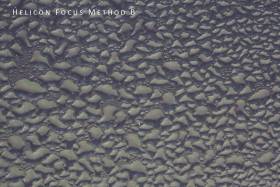
21. Condensation 1
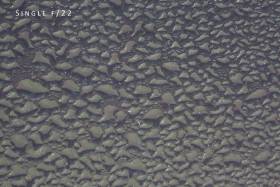
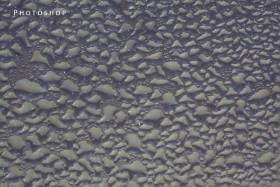
Eight captures at f/8 and 1/13 second made with the Canon 5D Mark II and Sigma 150mm /2.8 macro lens mounted on a tripod. For this set of focus slices the camera was set at an angle of approximately 15º to ensure that a single image would not achieve sufficient depth of field to capture all the droplets in-focus. A single image capture at f/22 is provided for comparison: it can be readily observed that the lower right and upper left area of the image are soft. The Photoshop and both Helicon Focus processing methods differ only subtly in the way the render the surface of the droplets.
